Tribute to Jim Lenker:
Jim Lenker was one of the founding members of BSP , which was incorporated in 1998.
He served as BSP Vice President, BSP Board Member, Woodworking Chair , also and handled the printing of BSP educational materials for many years. The bluebird trails that Jim set up prior to his death are still being monitored and are still providing productive nesting opportunities for bluebirds.
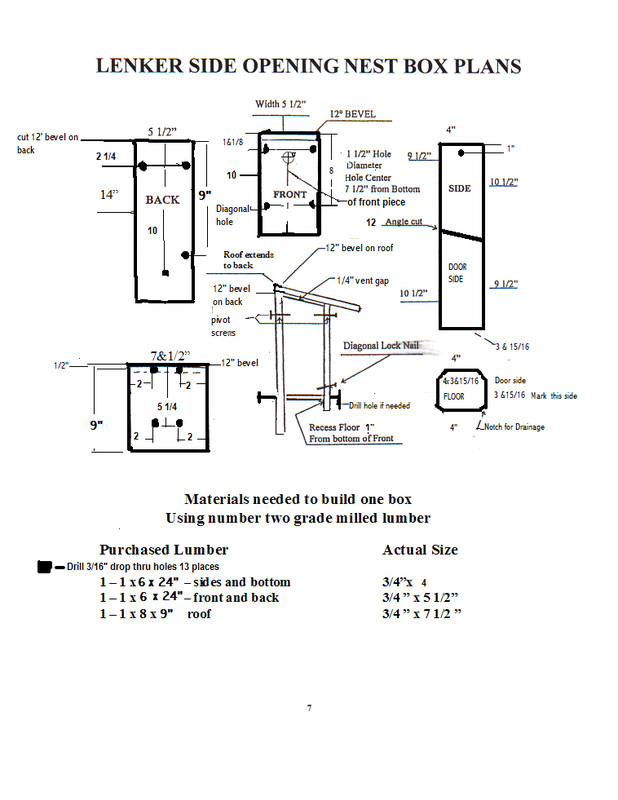
Lenker Nest Box Plan 5/2/13
The revised Lenker Nest Box Plan was design by the Bluebird Society of Pennsylvania's Woodworking Committee. The revisions were made to keep the nest box stronger and dyer and easier to replace the roof when needed. You will notice the roof now over extends the back top of the nest box to achieve greater strength and improvements toward keeping water out of the nest box. Though the roof placement is different than the original Lenker Nest Box Plan we believe this revised roof placement greatly improves the Lenker Nest Box.
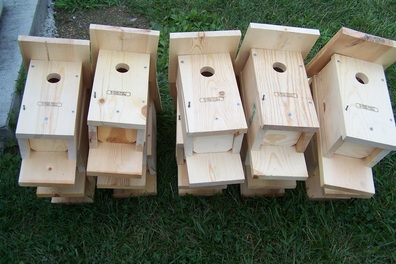
Revised Lenker Nest Box
ASSEMBLY INSTRUCTIONS
FOR THE LENKER BLUEBIRD NESTBOX
1. Cut all boards to lengths indicated on layout drawing. All measurements should be from the top this will eliminate errors due to incorrect board lengths.
2. Use three 1 5/8” screws to fasten the BACK to the left and right side pieces. The sides
(High side sees drawing) will be approx. ¼” below the back piece to allow for ventilation. The right side screws can be tight, however, let the single screw on the left side piece loose to allow the left side to swing as this side will be the access door.
3. Place the bottom piece between the SIDES and using 1 5/8” screws attach the floor piece to the back of the box using the pre-drilled holes in the back piece and right side piece.
4. Using three 1 5/8” screws attach the front. Right side screws can be tight. The single
Left side screw should be loose to allow the left side piece to swing open..Align the front and back pivot screws to ensure door opens evenly.
5. (Optional) Install a 1 5/8” screw thru the lower front center into the floor piece
6. Install the top roof piece flush with the back piece. Attach with four 1 5/8” screws using the four predrilled holes.
7. Drill out the hole on the front left side used for the door lock nail. This should be at a slight downward angle. Install nail or screw.
Note: The small cuts on the inside front cover are to allow the baby birds to climb out of the nest box.
CONGRATULATIONS YOU HAVE COMPLETED A BLUEBIRD BOX ENJOY.
Treat the outside of the nest box with RAW Linseed Oil each fall season. Do not use Boiled Linseed oil. And do not use Pressure treated lumber, it is poisonous to birds.
The Lenker Bluebird Nest box was developed by Jim Lenker, A founding member of the Bluebird Society of Pennsylvania (BSP). The Lenker nest box design was reviewed and approved by the North American Bluebird Society. These plans are distributed by the BSP, to encourage the erection and proper monitoring of nest boxes to aid Bluebirds and other native cavity nesting species. For more information visit thebsp.org Rev 5/2/13
